So, here is part two of my RCP tutorial. Last time I build a small RCP application that grabbed a list of all my files on the root of my drive (in my case, C:/) and displayed them in a tree. While I had intended to build a JAR file to incorporate with my app that used the Google web API to query Google, wouldn’t you know it, Google went and dropped their web API. THE MODEL for web services, and they drop it. Others believe that this is a signal of the end of the web-services bubble. Personally, I think it’s a sign that Google is become less of the good guy and more like “Evil” shit-heads more concerned with the bottom line. Regardless of motive, I have to change course here…
So as a substitute to the formerly awesome Google web service, I had to build my own simple web service using Tomcat. For this article, I will build a simple web service that returns the string “My Test Webservice” in Eclipse. Nothing fancy, I just didn’t feel like going with Hello World.
First thing first, make sure you have the Eclipse Web Tools project installed. For me, I am using the BIRT All-In-One install of Eclipse 3.2 Catalina, with WTP installed separately via the update manager. The WTP also has a separate All-in-One package. Make sure you also have configured a Server and Server Runtime for testing and debugging. Certain aspects of the application development did not work properly without them. So here, I will walk through the process of creating the server.
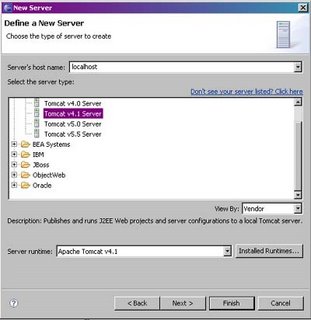
First, I went up to File/New and chose Other. I chose the Server category, and chose a Server project. Since I am using Apache Tomcat 4.1 (which I keep around for other projects compatibility) I choose Tomcat 4.1 as my server type. The next screen sets up the server runtime, so I need to set the install directory for Tomcat 4.1, and I set up the JRE location to where my JDK is installed. I am using Java 1.5.09, which when I set the directory, the JRE Name and JRE Libraries automatically filled themselves out. Once setup, I just click Next, and then Finish to complete the setup. Now, I can start and stop this server configuration by going up to Window, Show View, Other, and choose server. A server tab opens up in the same area where the Console tab and the Properties tab are.

Figure 1. Server Configuration

Figure 2. Servers Tab
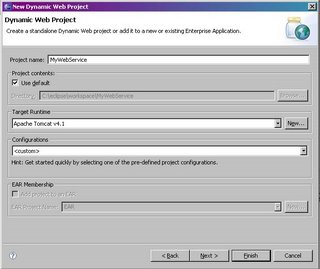
With that installed, I created a new Dynamic Web Project called MyWebService. I make sure that my Target Runtime is set to the Runtime configured in my server project configuration. On the next screen, I do not set any other configurations and keep things default (Dynamic Web Module and Java are checked, JavaServer faces is not). I keep the Context Root set to MyWebService and the content directory to default. Once done I click Finish.

Figure 3. New Dynamic Web Project
With my project created, I create a new Java class in my project called MyWebService in the com.digiassn.blogspot package. I write the following code for this class:
package com.digiassn.blogspot;

public class MyWebService
{
public String outputResponse()
{
   return "My Test Webservice";
}
}

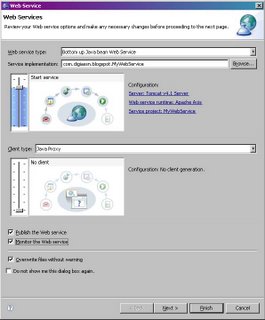
Figure 4. Web Service Configuration
I also choose to create a WSDL file to for other future programs to consume this service, which will include the finalization of the RCP application. On the next few screens, I have to start the Server in order to proceed, which publishes the project. I also choose not to publish to a UDDI registry.
Now, I want to test my installation, so I go to the following URL:
http://localhost:8080/MyWebService/services/MyWebService
And the WSDL file is located here:
http://localhost:8080/MyWebService/wsdl/MyWebService.wsdl
So now I want to test my web service to make sure it works. This is actually incredibly easy in Eclipse with WTP, a lot easier than I would have thought. One way I can test is to right-mouse click on the MyWebService.java file, choose web service, and select Generate Sample JSP. I get a Web Services Test Client page with some buttons and some panes with the example outputs. I can also go to the WebContent/wsdl/MyWebService.wsdl file and choose “Test with Web Services Explorer”. From here, I can launch various test pages and view the SOAP envelope messages that get sent back and forth.
Now I can publish to the server and I have my web service to consume in the RCP application.


No comments:
Post a Comment